A Browser in RAM, a MIDI Keyboard at the Controls

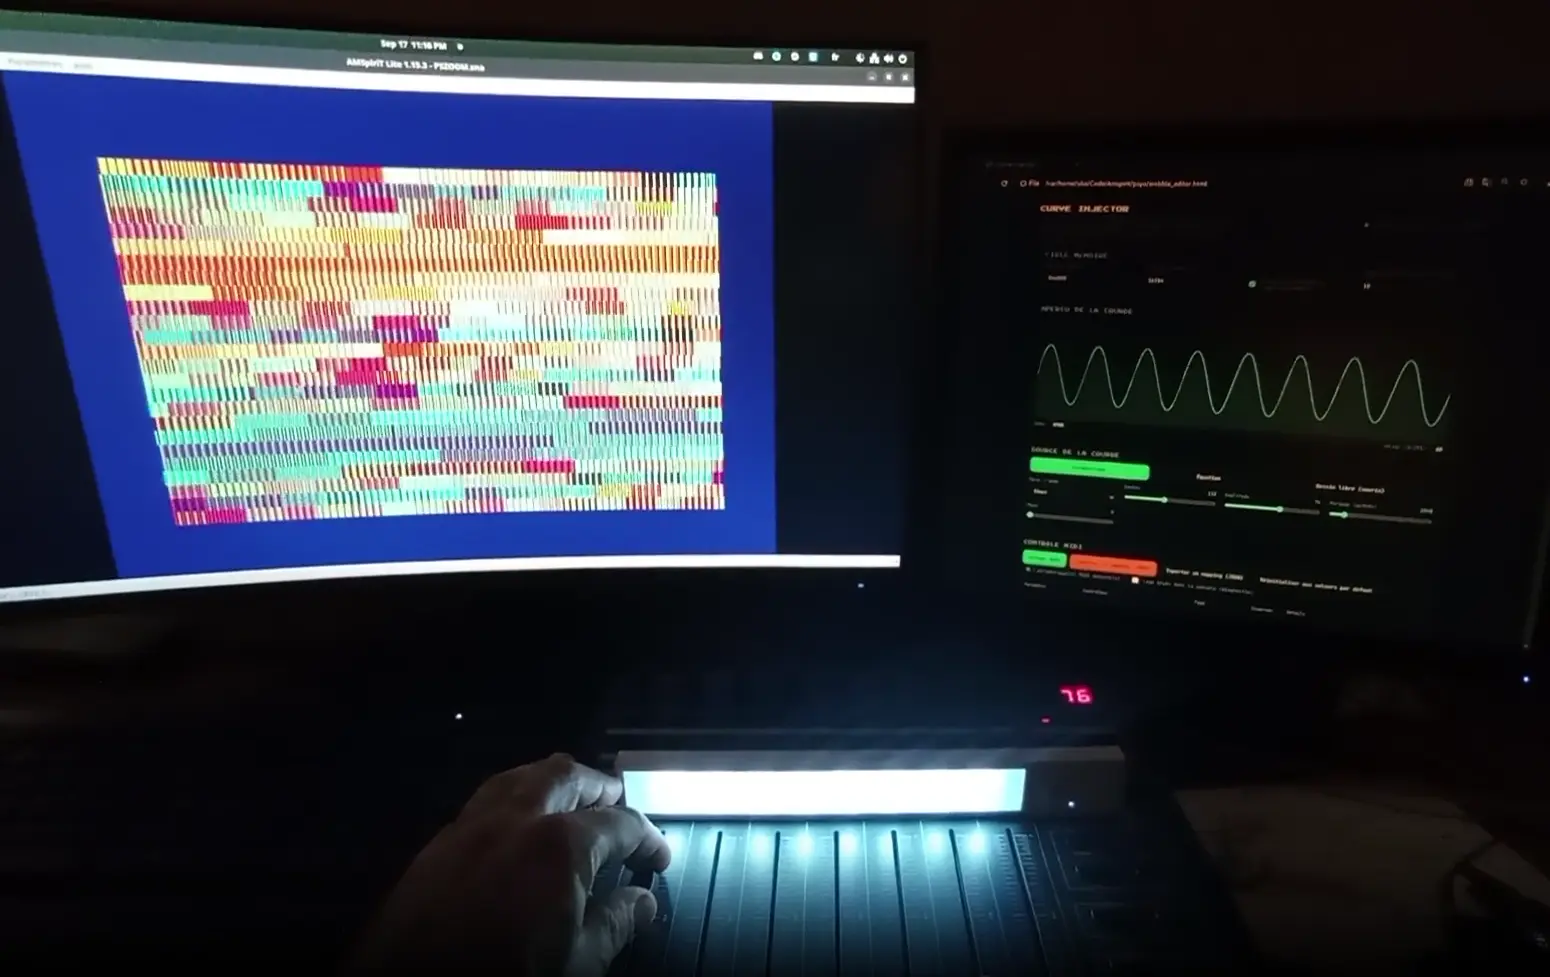
In the previous article, I discussed the general philosophy of AMSpiriT Lite, and in particular this web API that sets it apart from most CPC emulators: a straightforward REST interface, queryable with curl from a terminal, but which in reality opens the door to use cases one wouldn't imagine with a "closed" emulator.
This series aims to go into detail about the main endpoints and key features of the emulator. But rather than listing endpoints, which would quickly become tedious, we'll proceed from concrete use cases. In this post, we start with one of the most-used endpoints, /api/ram, illustrating it with a small tool: the Curve Injector.
This tool, available on the GitHub repository amspirit-releases, is a curve generator that runs in a browser (it's just a web page), and allows writing generated data directly to the emulator's RAM. Nothing more, nothing less – but this "nothing more" opens quite a few doors. And since we like to experiment, we'll drive it all with a MIDI device. Here's a video to show how it works:
The tool was born from a classic development situation: you want to tune a value table to nail an animation. When you do this, you're fumbling around: you try a formula, reassemble, transfer, test, and start over. You spend your time replacing the table without touching the rest of the code. How to simplify these back-and-forths?
Since RAM writing can be controlled by an HTTP API accessible from any program, the quickest answer wasn't "I recompile and reload", but "I write a web page that generates the table and pushes it to RAM live". And it works even without the source code: all you need is a program running in the emulator and knowing what address to inject the data to.
Polished and reworked, the tool now offers:
- a parametric generator (sine, triangle, sawtooth, square, pulse, noise), where you adjust the center, amplitude, period, phase and duty cycle,
- an equation mode (a JavaScript expression, for cases the parametric mode doesn't cover),
- a freehand drawing mode with the mouse,
- an Output Encoding panel to filter the output: bounds and numeric masks in Data mode, or direct color conversion via Gate Array mode,
- and optional MIDI control over each parameter.
It all fits in a single standalone HTML file – no server, no build: you double-click it and it works. Driving an emulated CPC from a MIDI keyboard is probably just one example of what this open API makes possible. Let's dive deeper!
Hello, AMSpiriT?
The starting point of all this is that AMSpiriT exposes a small REST API on http://127.0.0.1:6128, which you enable on demand. Most examples from the previous article relied on two endpoints: /api/ram, for reading and writing memory, and /api/screenshot, for fetching a screen image. We start here with the first of the two, since it does all the work in the Curve Injector. But before anything else, we need to make sure we can properly communicate with AMSpiriT.
/api/ping: a first probe
Before diving into anything, you need to verify that this whole setup is awake. That's the role of /api/ping, which returns the emulator's global state. It's also the first endpoint the Curve Injector calls when loading the page.
With AMSpiriT running on the machine, just open the URL http://127.0.0.1:6128/api/ping in a browser:
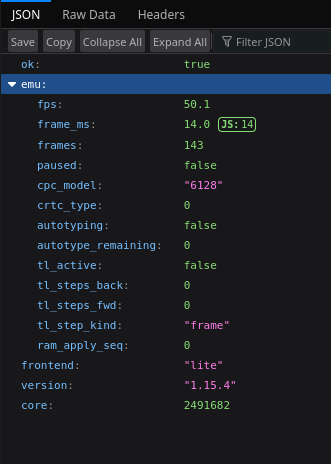
You get the same result with the curl command in a terminal:
$ curl -s http://127.0.0.1:6128/api/ping

{"ok":true,"emu":{"fps":50.1,"frame_ms":11.8,"frames":32395,"paused":false,
"cpc_model":"6128","crtc_type":0,"autotyping":false,"autotype_remaining":0,
"tl_active":false,"tl_steps_back":0,"tl_steps_fwd":0,"tl_step_kind":"frame",
"ram_apply_seq":0},"frontend":"lite","version":"1.15.4","core":2491682}
Here's the detail of the fields:
frontend,versionandcoreallow you to identify the exact version of AMSpiriT: here version Lite 1.15.4, with the emulation core identifier.emuprovides information about the emulated machine and its global state. In particular:cpc_modelandcrtc_typeidentify the type of emulated machine.framesgives the number of emulated frames since startup and serves as a reference clock. As long as it remains at 0, the Z80 has not executed a single instruction yet, even though the HTTP server is already responding.autotypingandautotype_remainingprovide information on the automatic text entry in progress. This is useful for waiting until a text transmission finishes before moving on to something else, but it doesn't concern us here.tl_active,tl_steps_back,tl_steps_fwdandtl_step_kinddescribe the state of the rewind feature (stepping backward/forward through execution). This is also off-topic for the Curve Injector.ram_apply_seqis a counter of RAM writes actually applied. We'll be interested in this one: we'll discuss it right below.
Spilling Ink
The Curve Injector, as its name suggests, writes data to RAM. To do this, you just send a POST request with a JSON body:
curl -s -X POST http://127.0.0.1:6128/api/ram \
    -H "Content-Type: application/json" \
    -d '{"addr": 49152, "bank":0,
         "data" : "ed5fe61ff64001107fed49ed7918f1",
         "exec":true, "entry": 49152 }'

{"ok":true,"seq":1}
Here, we write a sequence of bytes, passed as a hexadecimal string (data), to address 49152: that is 0xC000, the start of the CPC's default video memory. The address is given in decimal because JSON has no hexadecimal notation for integers, and the addr field must be an integer: a string like "0xC000" would be rejected.
The optional exec and entry parameters indicate that you want to execute the transferred code, and from which address. Here, the byte sequence corresponds to a small program that randomly changes the border color in a loop (a "raster" effect):
LD A,R          ; ED 5F     : une valeur pseudo-aléatoire
AND #1F         ; E6 1F     : on garde les 5 bits du code couleur
OR #40          ; F6 40     : on en fait une commande couleur
LD BC,#7F10     ; 01 10 7F  : port du Gate Array, stylo 16 (la bordure)
OUT (C),C       ; ED 49     : sélection du stylo
OUT (C),A       ; ED 79     : envoi de la couleur
JR debut        ; 18 F1     : et on recommence
We set exec to true so the program starts as soon as the transfer is done. Here's what it looks like:
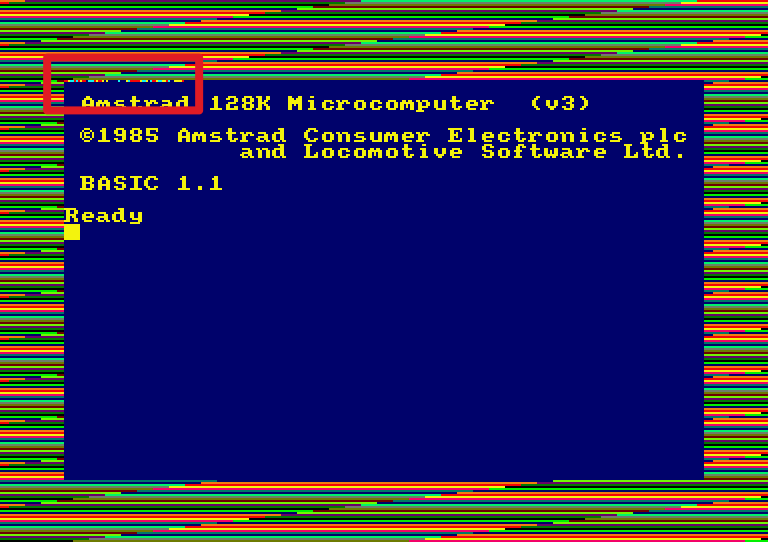
Notice the small segment of colored pixels above the word "Amstrad": those are the bytes of our program. They're visible because we wrote them at the start of video memory.
The bank parameter is optional: it indicates which 16 KB physical bank you want to write to, from 0 to 3 for the four banks making up a CPC's base 64 KB, 4 and beyond for extension banks on machines that have them (128 KB and up). The attentive will have noticed a subtle point: an address beyond 0x3FFF (16 KB) overflows into the following banks. Since 0xC000 equals 3 × 0x4000, writing to address 0xC000 from bank 0 is the same as writing to physical bank 3, at offset 0. We could have used addr=0 and bank=3, but starting from bank 0 with the "usual" address is more telling.
Safe Reading
Even though the Curve Injector doesn't need to read RAM, we'll still detail this aspect of the /api/ram endpoint. Reading is done with a simple GET, this time without JSON:
GET /api/ram?addr=0xC000&len=256&view=raw&bank=0
addr and len unsurprisingly define the address and length of the block to read. This time, you can give the address in hexadecimal, since it's a URL parameter and no longer a JSON field.
bank plays the same role as in writing. view, on the other hand, deserves a word of explanation: the CPC can switch its memory banks and overlay its ROMs onto RAM, so reading "address 0xC000" can have multiple meanings until you've specified through which mapping you're looking. Three views are available:
raw(by default): the raw content of the requested bank, regardless of the current memory configuration.cpu: the memory as the Z80 sees it at that moment, with the ROMs and banks currently connected. It's the view you want whenever you're trying to observe what a running program is actually executing, typically to debug it.fw: the firmware view, which gives access to the ROMs (the low ROM and active high ROM).
In our case, directly addressing banks with raw is the most suitable.
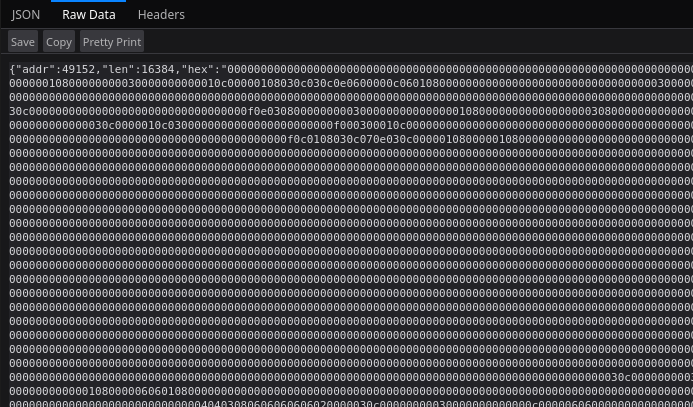
The response comes back as a simple hexadecimal string ({"hex": "004080c0..."}), two characters per byte, no separator. Again, you can quickly check in the browser that it works:
If You Don't Acknowledge Me... Everything Could Fade
We saw that after a write command, AMSpiriT responds immediately with {"ok":true,"seq":N}. This response is a simple acknowledgment: it indicates the write was received and queued, not that it's already been applied. The emulator won't perform it until the next cycle of its main loop.
This is where ram_apply_seq, which we saw earlier in /api/ping, comes into play. Just compare it to the number N returned in the seq field: as soon as ram_apply_seq is greater than or equal to N, the write has actually taken place.
In other words: re-reading RAM right after receiving {"ok":true,"seq":N} might return the old content if you're faster than the main loop. Best practice is thus to poll /api/ping until ram_apply_seq reaches N before trusting a re-read:
# Écriture de 4 octets en 0xC000
$ curl -s -X POST http://127.0.0.1:6128/api/ram \
    -H "Content-Type: application/json" \
    -d '{"addr": 49152, "data": "ff00ff00"}'
=> {"ok":true,"seq":5}

# Vérification que l'écriture a eu lieu
$ curl -s http://127.0.0.1:6128/api/ping | grep -o '"ram_apply_seq":[0-9]*'
=> "ram_apply_seq":5

# C'est bon, on peut relire les données
$ curl -s "http://127.0.0.1:6128/api/ram?addr=0xC000&len=4&bank=0"
=> {"addr":49152,"len":4,"hex":"ff00ff00"}
Here, ram_apply_seq is already 5 at the time of the ping – the loop had time to run between the two curl calls – and the re-read confirms the bytes we sent. Since the counter is global, it also lets you detect if other writes were applied in the meantime: ram_apply_seq then exceeds N.
Video RAM Makes Waves
Good! Enough theory! Time to use our tool, with a first straightforward example: directly inject the generated curve into the 16 KB of video memory from 0xC000. The injection length here rises to 16,384 bytes: enough to fill the entire screen with the chosen pattern in a single POST /api/ram request. A video to illustrate all this:
It's a good stress test for the tool (16 KB encoded in hexadecimal is 32,768 characters in the JSON body), but above all it's a pedagogical example: the relationship between the shape of the curve edited in the browser and the bytes landing in video memory is immediately visible on screen. What's displayed are raw bytes, interpreted through the CPC's pixel encoding.
Staying the Course
The video at the top of the article showed a more classic use of the tool: you inject a value table at the exact address used by the running program, and watch the effect react in real time as you tweak the amplitude, period, or phase from the page.
In this case, a "raw" curve is rarely usable as-is: the program reading the table expects values in a specific range, sometimes with certain bits set, and you don't want an overly generous amplitude writing garbage to memory.
This is why, once the curve is calculated, each sample goes through an encoder before being sent to /api/ram. That's the role of the Output Encoding panel, in its default mode: Data mode. The Output Preview panel, below the curve preview, shows the result of this filtering: the curve as it will actually be written to RAM,
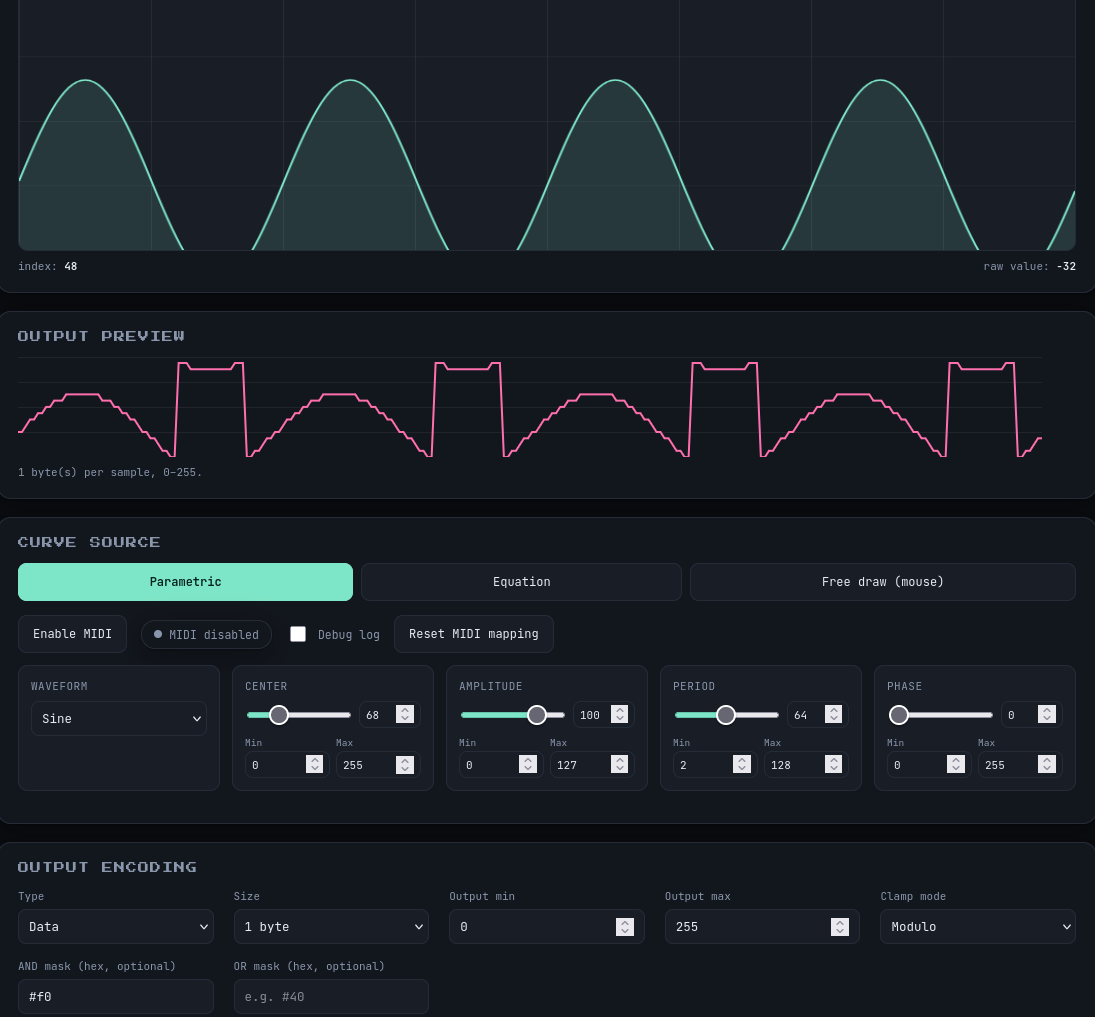
The pipeline is intentionally simple and applies in this order:
- Bounds: you set a minimum and maximum value. Anything that exceeds them is brought back into range, using one of two proposed modes:
- Saturate : the value is clipped to the nearest bound. An overly large sine wave gets "flattened" at the top and bottom.
- Modulo : the value "wraps around" within the range. Whatever goes out the top comes back in at the bottom, which is handy for scrolling or a looping index.
- AND (optional): a hexadecimal mask applied after the bounds, to keep only certain bits.
- OR (optional): a second mask, applied next, to force certain bits to 1.
- Size: each sample is finally written as 1 or 2 bytes. In 2 bytes, values are written in little-endian (least significant byte first), which is the Z80's native order: an
LD HL,(table)fetches the right value directly. This is useful for example for a screen address table or 16-bit displacement table.
The AND/OR combination is particularly handy on CPC, where you often manipulate bytes where some bits have a fixed meaning. An immediate example: as we saw with our little raster program, to change a color you send the Gate Array a byte of the form 010xxxxx, where the 5 least significant bits are the color code. The program did AND #1F then OR #40 on a random value. By applying the same masks in the encoder, any curve reliably produces a table of valid color commands, directly usable by an OUT (C),A.
This AND/OR example produces valid Gate Array codes, but in hardware code order, which has no visual meaning: two neighboring codes can produce unrelated colors. To get true gradients, you need to go one step further.
The Curve Takes Color
That's what gave rise to the second encoding mode: making the curve produce colors directly, rather than arbitrary numeric bytes.
A quick reminder is needed about how the CPC handles colors, since it differs from most 8-bit machines of the era: not a palette of tints chosen one by one and fixed in the video circuit, but true additive RGB synthesis, with three levels (0%, 50%, 100%) on each of the red, green, and blue components, for a total of 3³ = 27 possible colors.
Each color has a BASIC number (the one you pass to INK, from 0 to 26, which is just a base-3 decomposition of the three components) and a corresponding Gate Array code: the hardware value a program actually sends via OUT to apply it. The two don't match: the correspondence between them isn't arithmetic, and of the 32 values the 5 bits of the Gate Array code allow, 5 are redundant (RGB combinatorics only goes up to 27).
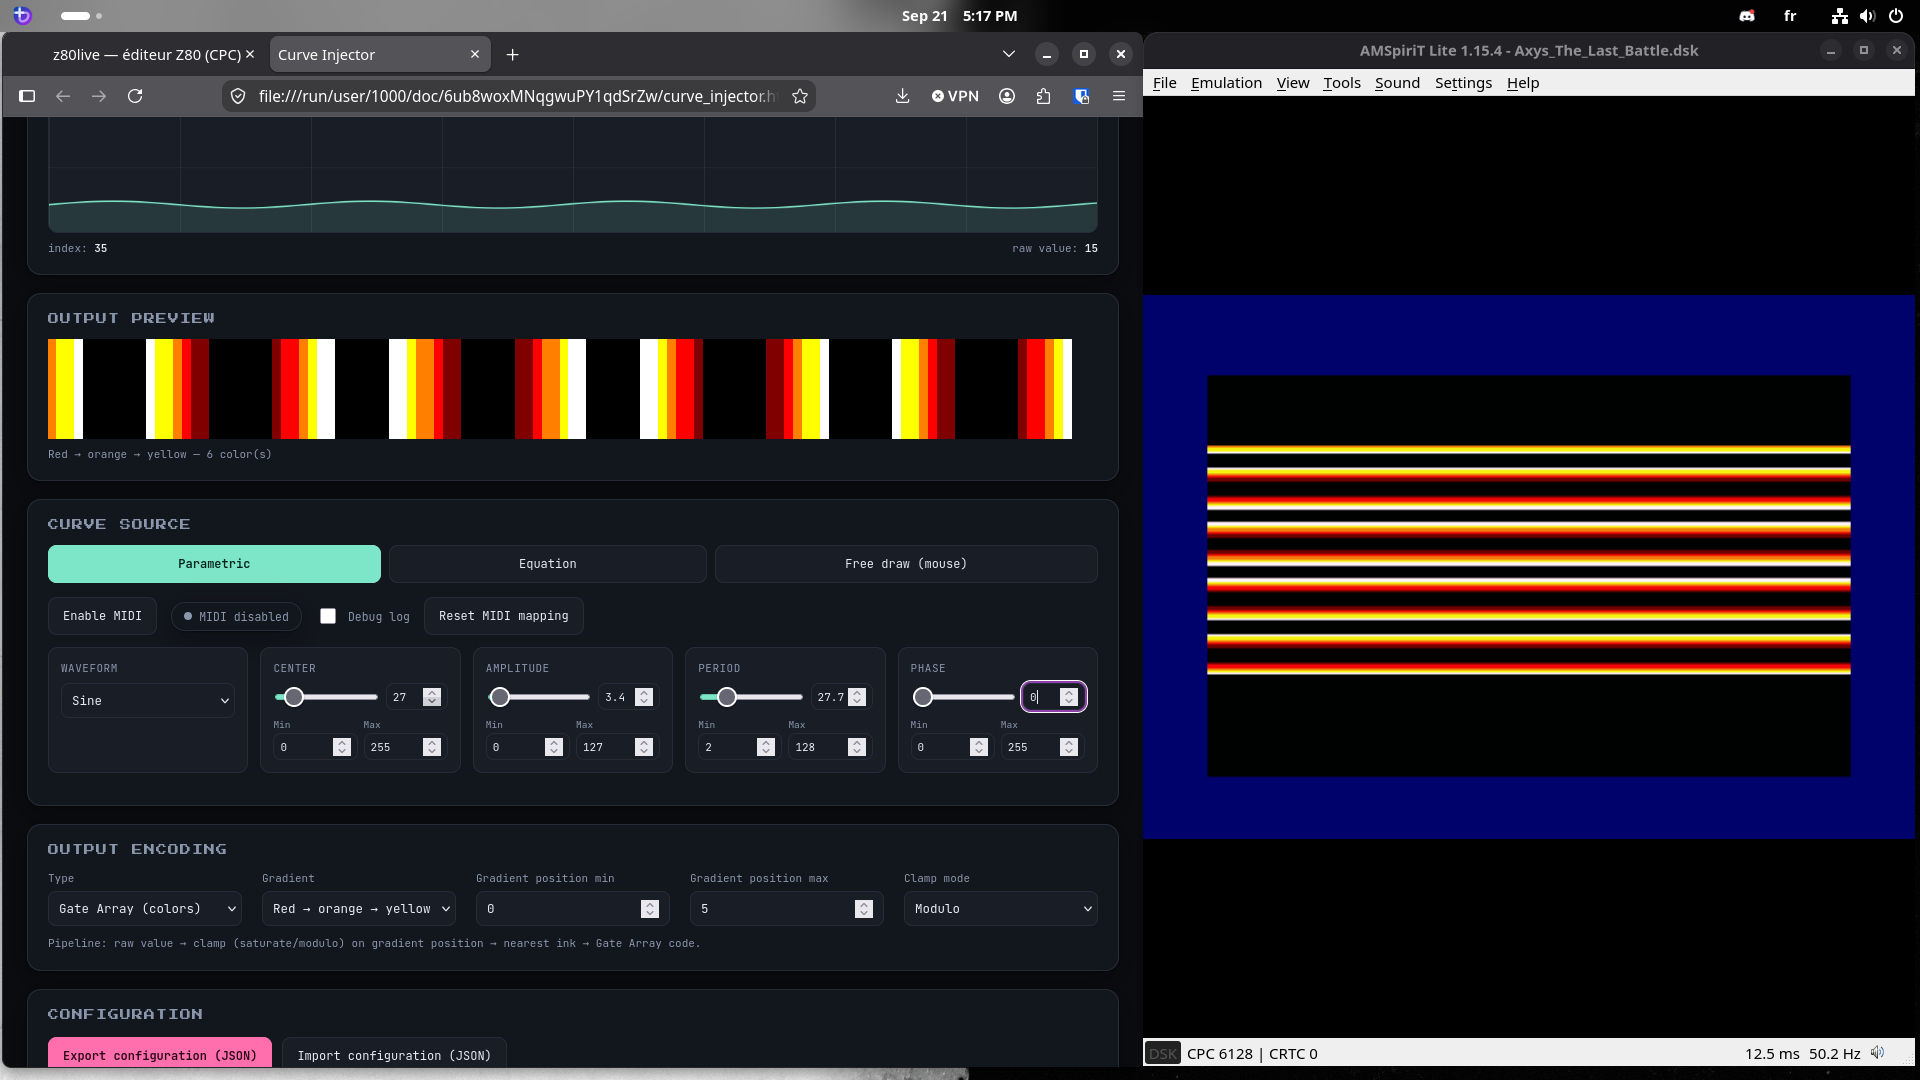
That's exactly the purpose of the second mode of the Output Encoding panel: Gate Array mode. The masks disappear: the curve value, still brought into its bounds by saturation or modulo, now designates a position in a color gradient. The color found at that position is then converted to its Gate Array code.
Several families of gradients are offered:
- chromatic circles: vivid, pastel, dark, or the full spectrum tints,
- a brightness ramp crossing all 27 colors, from black to white,
- a ramp per hue (red, green, blue, cyan, magenta, yellow), from black to white,
- for the three primary hues, a variant that drifts toward a neighboring hue as intensity rises: red sliding toward orange then yellow is, unsurprisingly, the foundation of a good flame gradient.
The palettes are defined in simple arrays at the start of the script: it's easy to modify them or add your own.
As in Data mode, the Output Preview panel shows exactly what will be written to RAM – but this time as a strip of actual colors rather than a numerical curve.
Full MIDI!
In some of the videos, you may have noticed the curve parameters are driven from a physical MIDI controller. Nothing exotic on the browser side: the Curve Injector simply relies on the Web MIDI API, natively available in Chromium-based browsers (Chrome, Edge...). It all starts with an access request, which triggers a permission window in the browser:
navigator.requestMIDIAccess({sysex: false}).then(function(access) {
  access.inputs.forEach(function(input) {
    input.onmidimessage = onMidiMessage;
  });
});
Once access is granted, each detected MIDI input (access.inputs) gets assigned an onmidimessage handler. Each message arrives as a small array of bytes (evt.data) that you decode by hand – the MIDI standard is no JSON. The Curve Injector only cares about Control Change (CC) messages, recognizable by their first byte:
function onMidiMessage(evt) {
  var data = evt.data;
  if (!data || data.length < 3) return;
  if ((data[0] & 0xF0) !== 0xB0) return;   // on ignore tout ce qui n'est pas un CC
  var channel = data[0] & 0x0F;             // canal MIDI, 0-15
  var cc      = data[1];                    // numéro de contrôleur, 0-127
  var value   = data[2];                    // valeur reçue, 0-127
  // ...
}
Then comes the learning mechanism ("Learn"): clicking the button for a parameter puts the tool in listening mode, and the first CC received on any input is associated with that parameter. No need to dig through the controller's docs to figure out which CC number corresponds to which knob:
function captureLearn(deviceId, deviceName, channel, cc, value) {
  var m = midiMapping[learningParam];
  m.device  = deviceId;
  m.channel = channel;
  m.cc      = cc;
  // une valeur de 63 ou 65 trahit un encodeur relatif
  // plutôt qu'un potard absolu
  m.type = (value === 63 || value === 65) ? 'relative' : 'absolute';
}
This last line deserves an explanation: depending on the controller, a CC can carry two different logics. A potentiometer or fader sends an absolute value (0-127), which you scale linearly onto the target parameter's range – including for the waveform, the 0-127 range then divided into equal slices, one per available shape. A boundless rotary encoder, meanwhile, has no absolute position to transmit: it typically sends 65 for "+1 step" and 63 for "-1 step", a relative value you accumulate step-by-step rather than project directly:
if (m.type === 'relative') {
  var delta = (value === 65) ? 1 : (value === 63) ? -1 : 0;
  newVal = cur + delta * step;
} else {
  newVal = min + (value / 127) * (max - min);
}
Once the new value is calculated, it's applied to the parameter just as if the user had moved the slider with the mouse: the MIDI CC is just another event source, like a DOM input or change. This source-agnosticism is what lets the rest of the chain (curve regeneration, encoding, sending to /api/ram) remain oblivious to MIDI.
So the complete chain is: MIDI controller → Web MIDI event in browser → parameter update → curve regeneration → encoding → send via /api/ram → emulated RAM → screen render.
That's exactly the kind of unlikely-but-obvious assembly a simple HTTP API on an emulator allows: the MIDI controller, the browser, and the emulator were designed independently, but they interface cleanly and can work together.
There you go! I hope this little article has given you some ideas. The Curve Injector is available on the amspirit-releases repository. As always, get your hands on it, tinker with it, make it useful for you, and don't hesitate to share it!
Siko / Logon System
September 2026